
前回の記事では、Googleスプレッドシートを利用してCRUD操作を行う方法を紹介しました。今回は、そのデータ保存場所をGoogleスプレッドシートからkintoneに変更した内容を紹介します。
準備
1. kintone APIの設定
kintone APIを利用するために、以下の情報を取得してください。
- kintoneのドメイン
- kintone APIトークン
- kintoneアプリID
2. ユーザー情報の設定
ユーザー情報をusers.jsonファイルに設定します。このファイルは安全な場所に配置します。
[
    {
        "username": "user1",
        "password": "password1"
    },
    {
        "username": "user2",
        "password": "password2"
    }
]
認証機能の実装
1. authenticate.php
ユーザーの認証を行うスクリプトです。認証が成功した場合はセッションを開始し、JSON形式でレスポンスを返します。
<?php
session_start();

if ($_SERVER['REQUEST_METHOD'] === 'POST') {
    $username = $_POST['username'];
    $password = $_POST['password'];

    // 安全な場所に配置したユーザーデータベースを読み込む
    $users = json_decode(file_get_contents(__DIR__ . '/../../users.json'), true);

    if ($users === null) {
        header('Content-Type: application/json');
        echo json_encode(['status' => 'error', 'message' => 'Failed to read users.json']);
        exit;
    }

    // ユーザー名とパスワードが一致するか確認
    $isAuthenticated = false;
    foreach ($users as $user) {
        if ($user['username'] === $username && $user['password'] === $password) {
            $isAuthenticated = true;
            break;
        }
    }

    if ($isAuthenticated) {
        $_SESSION['logged_in'] = true;
        header('Content-Type: application/json');
        echo json_encode(['status' => 'success']);
        exit;
    } else {
        header('Content-Type: application/json');
        echo json_encode(['status' => 'error', 'message' => 'Invalid username or password']);
        exit;
    }
} else {
    header('Location: login.html');
    exit;
}
?>
2. check_auth.php
ユーザーの認証状態をチェックするスクリプトです。
<?php
session_start();
header('Content-Type: application/json');

if (isset($_SESSION['logged_in']) && $_SESSION['logged_in'] === true) {
    echo json_encode(['authenticated' => true]);
} else {
    echo json_encode(['authenticated' => false]);
}
?>
3. logout.php
ログアウト処理を行うスクリプトです。
<?php
session_start();
session_unset();
session_destroy();
header('Location: login.html');
exit;
?>
4. login.html
ユーザーがログインするためのフォームを提供するHTMLページです。認証成功後にindex.htmlにリダイレクトします。
<!DOCTYPE html>
<html>
<head>
    <title>Login</title>
</head>
<body>
    <h1>Login</h1>
    <form id="loginForm">
        <label for="username">Username:</label>
        <input type="text" id="username" name="username" required>
        <br>
        <label for="password">Password:</label>
        <input type="password" id="password" name="password" required>
        <br>
        <button type="submit">Login</button>
    </form>
    <script>
        document.getElementById('loginForm').addEventListener('submit', async function(event) {
            event.preventDefault();
            const form = event.target;
            const formData = new FormData(form);
            const response = await fetch('authenticate.php', {
                method: 'POST',
                body: formData
            });
            const result = await response.json();
            if (result.status === 'success') {
                window.location.href = 'index.html';
            } else {
                alert(result.message);
            }
        });
    </script>
</body>
</html>
CRUD操作の実装
1. api.php
kintone APIを利用してデータの読み取り、追加、更新、削除を行うスクリプトです。
<?php
error_reporting(0); // 全てのエラーメッセージを非表示にする
require 'auth.php'; // 認証ミドルウェアを読み込む
require 'config.php'; // 設定ファイルを読み込む

header('Content-Type: application/json'); // レスポンスのContent-TypeをJSONに設定

// ログをファイルに出力するための関数
function writeLog($message) {
    file_put_contents('debug.log', date('Y-m-d H:i:s') . ' ' . $message . "\n", FILE_APPEND);
}

// kintone APIに接続するための共通ヘッダーを取得する関数
function getKintoneHeaders($method) {
    $headers = [
        'X-Cybozu-API-Token: ' . KINTONE_API_TOKEN,
    ];

    if ($method !== 'GET') {
        $headers[] = 'Content-Type: application/json';
    }

    return $headers;
}

// HTTPリクエストの種類とアクションに応じて処理を分岐
if ($_SERVER['REQUEST_METHOD'] === 'POST' && isset($_GET['action'])) {
    $action = $_GET['action'];
    $input = json_decode(file_get_contents('php://input'), true);

    // データの追加処理
    if ($action === 'add') {
        $values = $input['data'];
        $id = $values[0];

        // IDが既存のデータと重複していないか確認
        $existingData = readData();
        foreach ($existingData as $row) {
            if ($row['ID']['value'] == $id) {
                echo json_encode(['status' => 'error', 'message' => 'ID already exists']);
                exit;
            }
        }

        // データを追加
        $created = date('Y-m-d H:i:s');
        $updated = $created;
        $data = [
            'app' => KINTONE_APP_ID,
            'record' => [
                'ID' => ['value' => $id],
                'data1' => ['value' => $values[1]],
                'data2' => ['value' => $values[2]],
                'created' => ['value' => $created],
                'updated' => ['value' => $updated]
            ]
        ];
        $result = kintoneRequest('POST', 'record', $data);
        echo json_encode(['status' => 'success', 'result' => $result]);

    // データの更新処理
    } elseif ($action === 'update') {
        $values = $input['data'];
        $rowIndex = $input['rowIndex'];

        // 既存データを取得して'created'フィールドの値を保持
        $existingData = readData();
        $created = $existingData[$rowIndex]['created']['value'];
        $id = $existingData[$rowIndex]['ID']['value'];

        $updated = date('Y-m-d H:i:s');
        $data = [
            'app' => KINTONE_APP_ID,
            'id' => $existingData[$rowIndex]['$id']['value'],
            'record' => [
                'data1' => ['value' => $values[1]],
                'data2' => ['value' => $values[2]],
                'created' => ['value' => $created],
                'updated' => ['value' => $updated]
            ]
        ];
        $result = kintoneRequest('PUT', 'record', $data);
        echo json_encode(['status' => 'success', 'result' => $result]);

    // データの削除処理
    } elseif ($action === 'delete') {
        $rowIndex = $input['rowIndex'];
        $existingData = readData();
        $recordId = $existingData[$rowIndex]['$id']['value'];

        $data = [
            'app' => KINTONE_APP_ID,
            'ids' => [$recordId]
        ];
        $result = kintoneRequest('DELETE', 'records', $data);
        echo json_encode(['status' => 'success', 'result' => $result]);
    }

// データの読み取り処理
} elseif ($_SERVER['REQUEST_METHOD'] === 'GET' && $_GET['action'] === 'read') {
    $data = readData();
    writeLog('Read Data: ' . json_encode($data)); // デバッグ用にログ出力
    echo json_encode($data);
} else {
    echo

 json_encode(['status' => 'error', 'message' => 'Invalid request']);
}

// kintone APIにリクエストを送る関数
function kintoneRequest($method, $api, $data = []) {
    $url = 'https://' . KINTONE_DOMAIN . '/k/v1/' . $api . '.json';
    $options = [
        CURLOPT_URL => $url,
        CURLOPT_CUSTOMREQUEST => $method,
        CURLOPT_RETURNTRANSFER => true,
        CURLOPT_HTTPHEADER => getKintoneHeaders($method)
    ];

    if ($method === 'GET' && !empty($data)) {
        $url .= '?' . http_build_query($data);
        $options[CURLOPT_URL] = $url;
    }

    if ($method !== 'GET') {
        $options[CURLOPT_POSTFIELDS] = json_encode($data);
    }

    $ch = curl_init();
    curl_setopt_array($ch, $options);
    $response = curl_exec($ch);
    if (curl_errno($ch)) {
        writeLog('CURL Error: ' . curl_error($ch)); // デバッグ用にログ出力
        echo json_encode(['status' => 'error', 'message' => curl_error($ch)]);
        exit;
    }
    curl_close($ch);
    writeLog('Request: ' . json_encode($data)); // デバッグ用にリクエストをログ出力
    writeLog('Response: ' . $response); // デバッグ用にレスポンスをログ出力
    return json_decode($response, true);
}

// データを読み取る関数
function readData() {
    $data = [
        'app' => KINTONE_APP_ID
    ];
    $response = kintoneRequest('GET', 'records', $data);
    writeLog('Read Data Response: ' . json_encode($response)); // デバッグ用にログ出力
    return isset($response['records']) ? $response['records'] : [];
}
?>
2. config.php
kintone APIの設定情報を格納するファイルです。
<?php
define('KINTONE_API_TOKEN', 'your_api_token');
define('KINTONE_DOMAIN', 'your_domain');
define('KINTONE_APP_ID', 'your_app_id');
?>
3. index.html
kintoneでCRUD操作を行うためのフロントエンドのスクリプトです。認証状態をチェックし、認証されていない場合はログインページにリダイレクトします。
<!DOCTYPE html>
<html>
<head>
    <title>kintone CRUD</title>
    <style>
        /* テーブルのスタイル設定 */
        table {
            width: 100%;
            border-collapse: collapse;
        }
        th, td {
            border: 1px solid black;
            padding: 8px;
            text-align: left;
        }
        th {
            background-color: #f2f2f2;
        }
        button {
            margin: 5px;
        }
        #add-section, #logout-link {
            display: none; /* 初期状態で非表示 */
        }
        #login-link {
            display: none; /* 初期状態で非表示 */
        }
    </style>
    <script>
        // 日付をフォーマットする関数
        function formatDate(date) {
            const d = new Date(date);
            const year = d.getFullYear();
            const month = ('0' + (d.getMonth() + 1)).slice(-2);
            const day = ('0' + d.getDate()).slice(-2);
            const hours = ('0' + d.getHours()).slice(-2);
            const minutes = ('0' + d.getMinutes()).slice(-2);
            const seconds = ('0' + d.getSeconds()).slice(-2);
            return `${year}-${month}-${day} ${hours}:${minutes}:${seconds}`;
        }

        // 認証状態をチェックする関数
        async function checkAuth() {
            try {
                const response = await fetch('check_auth.php');
                const result = await response.json();
                console.log(result); // デバッグ用に結果をコンソールに出力
                if (result.authenticated) {
                    document.getElementById('add-section').style.display = 'block';
                    document.getElementById('logout-link').style.display = 'block';
                } else {
                    window.location.href = 'login.html'; // 認証されていない場合はログインページにリダイレクト
                }
            } catch (error) {
                console.error('Error checking auth:', error); // エラーメッセージをコンソールに出力
                window.location.href = 'login.html'; // エラーが発生した場合もログインページにリダイレクト
            }
        }

        // データを取得する関数
        async function fetchData() {
            try {
                const response = await fetch('api.php?action=read');
                const data = await response.json();
                console.log(data); // デバッグ用にデータをコンソールに出力
                return data;
            } catch (error) {
                console.error('Error fetching data:', error); // エラーメッセージをコンソールに出力
            }
        }

        // データを追加する関数
        async function addData() {
            const id = document.getElementById('id').value;
            const data1 = document.getElementById('data1').value;
            const data2 = document.getElementById('data2').value;
            const created = formatDate(new Date());
            const updated = created;
            try {
                const response = await fetch('api.php?action=add', {
                    method: 'POST',
                    headers: { 'Content-Type': 'application/json' },
                    body: JSON.stringify({ data: [id, data1, data2, created, updated] })
                });
                const result = await response.json();
                if (result.status === 'error') {
                    alert(result.message);
                } else {
                    console.log(result);
                    loadTable();
                }
            } catch (error) {
                console.error('Error adding data:', error); // エラーメッセージをコンソールに出力
            }
        }

        // データを更新する関数
        async function updateData(row, id) {
            const data1 = document.getElementById(`data1_${row}`).value;
            const data2 = document.getElementById(`data2_${row}`).value;
            const updated = formatDate(new Date());
            try {
                const response = await fetch('api.php?action=update', {
                    method: 'POST',
                    headers: { 'Content-Type': 'application/json' },
                    body: JSON.stringify({ data: [id, data1, data2, '', updated], rowIndex: row })
                });
                const result = await response.json();
                console.log(result);
                loadTable();
            } catch (error) {
                console.error('Error updating data:', error); // エラーメッセージをコンソールに出力
            }
        }

        // データを削除する関数
        async function deleteData(row) {
            try {
                const response = await fetch('api.php?action=delete', {
                    method: 'POST',
                    headers: { 'Content-Type': 'application/json' },
                    body: JSON.stringify({ rowIndex: row })
                });
                const result = await response.json();
                console.log(result);
                document.getElementById(`row_${row}`).remove();
            } catch (error) {
                console.error('Error deleting data:', error); // エラーメッセージをコンソールに出力
            }
        }

        // テーブルをロードする関数
        async function loadTable() {
            const data = await fetchData();
            const table = document.getElementById('data-table');
            table.innerHTML = '<tr><th>ID</th><th>Data1</th><th>Data2</th><th>Created</th><th>Updated</th><th>Actions</th></tr>';

            if (data && data.length > 0) {
                data.forEach((row, index) => {
                    const rowElement = document.createElement('tr');
                    rowElement.id = `row_${index}`;
                    rowElement.innerHTML = `
                        <td>${row.ID.value}</td>
                        <td><input type="text" id="data1_${index}" value="${row.data1.value}"></td>
                        <td><input type="text" id="data2_${index}" value="${row.data2.value}"></td>
                        <td>${row.created.value}</td>
                        <td>${row.updated.value}</td>
                        <td>
                            <button onclick="updateData(${index}, '${row.ID.value}')">Update</button>
                            <button onclick="deleteData(${index})">Delete</button>
                        </td>
                    `;
                    table.appendChild(rowElement);
                });
            }
        }

        // ページ読み込み時にテーブルをロードし、認証状態をチェック
        window.onload = () => {
            checkAuth(); // 認証状態をチェック
            loadTable();
        };
    </script>
</head>
<body>
    <h1>kintone CRUD</h1>
    <table id="data-table"></table>
    <div id="add-section">
        <h2>Add New Data

</h2>
        <label for="id">ID:</label>
        <input type="text" id="id">
        <label for="data1">Data1:</label>
        <input type="text" id="data1">
        <label for="data2">Data2:</label>
        <input type="text" id="data2">
        <button onclick="addData()">Add Data</button>
    </div>
    <br><br>
    <a href="logout.php" id="logout-link">Logout</a>
    <a href="login.html" id="login-link">Login</a>
</body>
</html>
画面イメージなど
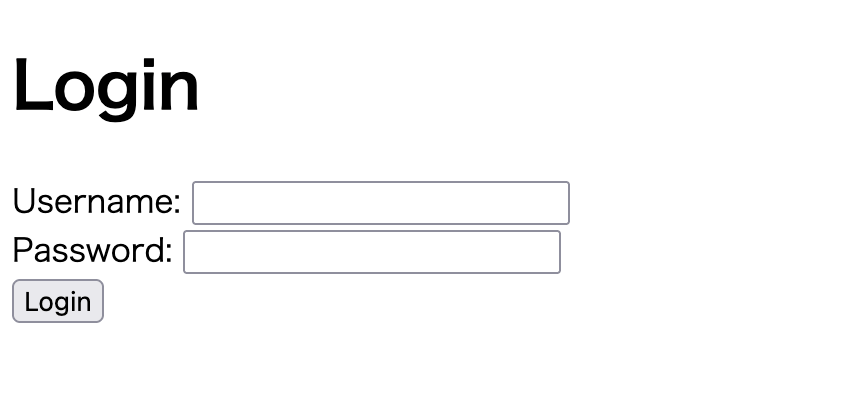
ログイン
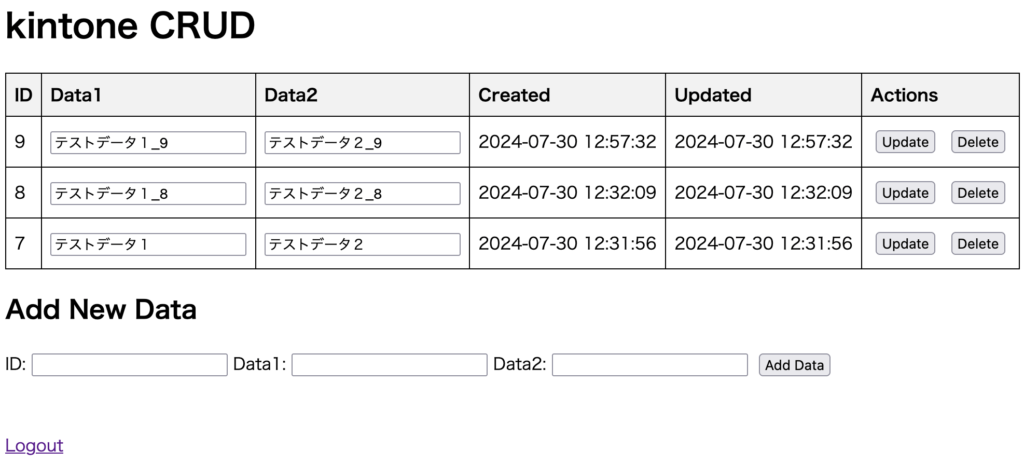
フロント メイン
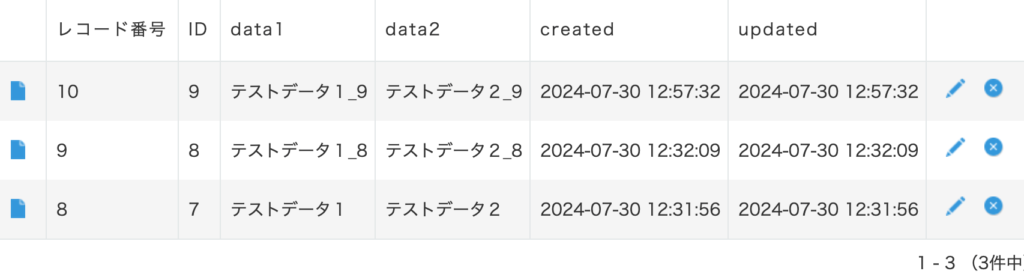
kintone レコード一覧
まとめ
この記事では、kintone(kintone REST API)を利用してPHPとJavaScriptでCRUD操作を実装する方法を紹介しました。


コメント