本記事では、jQuery と history.pushState を活用し、URLがページごとに変わる3ステップ構成(入力・確認・完了)の問い合わせフォームを作成する方法をご紹介します。
この方法では、シングルページアプリケーション (SPA) のようにページ遷移を模倣しながら、URLを動的に変更します。
使用技術とバージョン情報
- jQuery: ページ表示切り替えとAjaxによるデータ送信。
- バージョン: jQuery 3.6.4
- TailwindCSS: デザインとスタイル。
- バージョン: Tailwind CSS 3.x (CDN経由で最新バージョンを使用 ※テストは 3.4.15)
- PHP: フォームデータの受け取りとメール送信。
- バージョン: PHP 8.2.22
- サーバー環境: エックスサーバー
history.pushState の仕組みと役割
history.pushState は、ページを再読み込みせずにブラウザのURLを変更できるHTML5のAPIです。
これにより、ユーザーがシームレスにページ遷移しているような動作を実現できます。
主な特徴
- 履歴スタックの操作:
history.pushStateはブラウザの履歴に新しいエントリを追加します。- これにより、ブラウザの「戻る」「進む」ボタンが利用可能になります。
- ページ再読み込みなし:
- ページ全体を再読み込みせずにURLだけを変更します。
popstateイベント:
- ブラウザの「戻る」「進む」操作が行われた際に
popstateイベントをキャッチして、適切な画面を再表示できます。
使用例
history.pushState({}, "", "/new-path");
// URLが "/new-path" に変わりますが、ページの再読み込みは行われません。
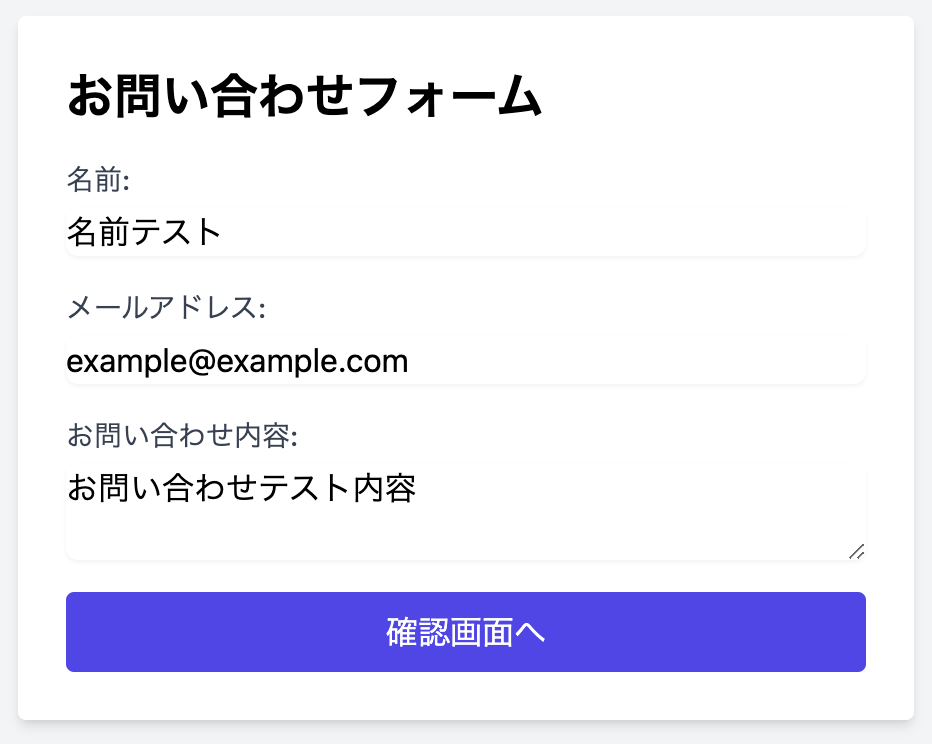
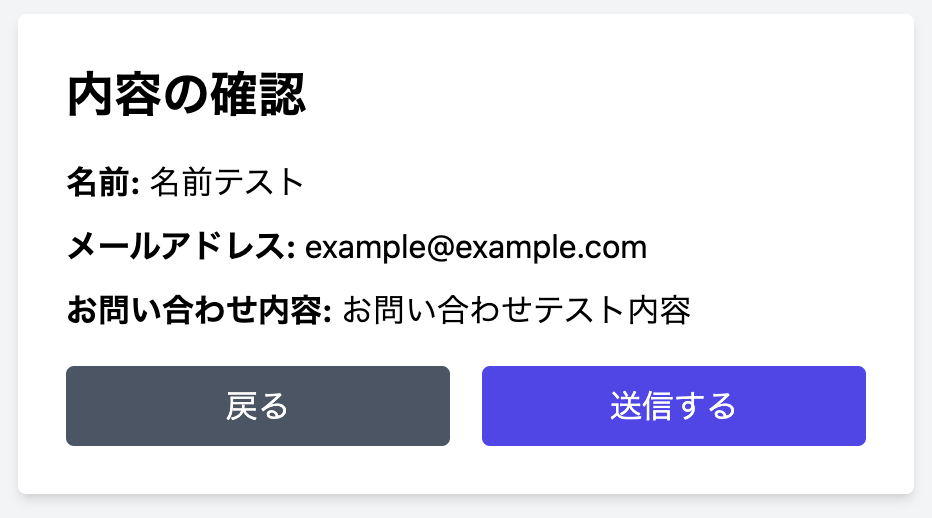
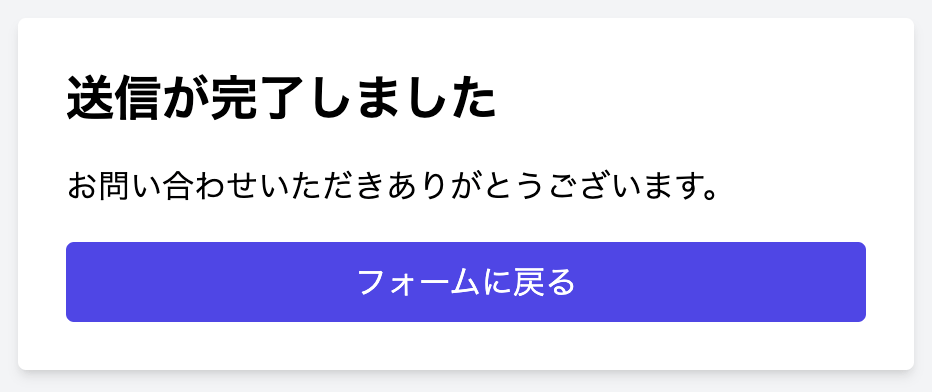
完成イメージ
ページ構成とURL
- 入力画面:
/(名前・メールアドレス・お問い合わせ内容を入力) - 確認画面:
/confirm(入力内容を確認) - 完了画面:
/complete(送信完了メッセージを表示)
スクリーンショット
入力画面

確認画面

完了画面

プロジェクトの構成
project/
├── index.html       # フロントエンドのメインファイル
├── backend/
│   └── contact.php  # フォームデータを受け取り、メール送信を行うPHPスクリプト
└── .htaccess        # URLのリダイレクト設定
実装手順
1. フロントエンド: index.html
以下は、問い合わせフォームのメインファイルです。
<!DOCTYPE html>
<html lang="ja">
<head>
  <meta charset="UTF-8">
  <meta name="viewport" content="width=device-width, initial-scale=1.0">
  <title>jQuery お問い合わせフォーム</title>
  <script src="https://cdn.tailwindcss.com"></script>
  <script src="https://code.jquery.com/jquery-3.6.4.min.js"></script>
</head>
<body class="bg-gray-100 min-h-screen flex items-center justify-center">
  <div id="form-wrapper" class="container mx-auto p-4 max-w-screen-md">
    <!-- 入力画面 -->
    <div id="input-screen" class="page bg-white shadow-md rounded p-6 w-full max-w-md mx-auto">
      <h1 class="text-2xl font-bold mb-4">お問い合わせフォーム</h1>
      <form id="contact-form">
        <div class="mb-4">
          <label for="name" class="block text-sm font-medium text-gray-700">名前:</label>
          <input type="text" id="name" name="name" required
            class="mt-1 block w-full border-gray-300 rounded-md shadow-sm focus:ring-indigo-500 focus:border-indigo-500">
        </div>
        <div class="mb-4">
          <label for="email" class="block text-sm font-medium text-gray-700">メールアドレス:</label>
          <input type="email" id="email" name="email" required
            class="mt-1 block w-full border-gray-300 rounded-md shadow-sm focus:ring-indigo-500 focus:border-indigo-500">
        </div>
        <div class="mb-4">
          <label for="message" class="block text-sm font-medium text-gray-700">お問い合わせ内容:</label>
          <textarea id="message" name="message" required
            class="mt-1 block w-full border-gray-300 rounded-md shadow-sm focus:ring-indigo-500 focus:border-indigo-500"></textarea>
        </div>
        <button type="button" id="to-confirm" class="w-full bg-indigo-600 text-white py-2 px-4 rounded hover:bg-indigo-700">
          確認画面へ
        </button>
      </form>
    </div>

    <!-- 確認画面 -->
    <div id="confirm-screen" class="page hidden bg-white shadow-md rounded p-6 w-full max-w-md mx-auto">
      <h1 class="text-2xl font-bold mb-4">内容の確認</h1>
      <p class="mb-2"><strong>名前:</strong> <span id="confirm-name"></span></p>
      <p class="mb-2"><strong>メールアドレス:</strong> <span id="confirm-email"></span></p>
      <p class="mb-4"><strong>お問い合わせ内容:</strong> <span id="confirm-message"></span></p>
      <div class="flex space-x-4">
        <button id="back-to-input" class="w-1/2 bg-gray-600 text-white py-2 px-4 rounded hover:bg-gray-700">
          戻る
        </button>
        <button id="submit-form" class="w-1/2 bg-indigo-600 text-white py-2 px-4 rounded hover:bg-indigo-700">
          送信する
        </button>
      </div>
    </div>

    <!-- 完了画面 -->
    <div id="complete-screen" class="page hidden bg-white shadow-md rounded p-6 w-full max-w-md mx-auto">
      <h1 class="text-2xl font-bold mb-4">送信が完了しました</h1>
      <p>お問い合わせいただきありがとうございます。</p>
      <button id="reset-form" class="mt-4 w-full bg-indigo-600 text-white py-2 px-4 rounded hover:bg-indigo-700">
        フォームに戻る
      </button>
    </div>
  </div>

  <script>
    $(document).ready(function () {
      const routes = {
        "/": "#input-screen",
        "/confirm": "#confirm-screen",
        "/complete": "#complete-screen",
      };

      // ページの表示切り替え
      function navigate(path) {
        $(".page").addClass("hidden"); // 全画面を非表示
        const target = routes[path] || "#input-screen"; // 表示対象画面を取得
        $(target).removeClass("hidden"); // 対象画面を表示
        history.pushState({}, "", path); // URL を変更
      }

      // 初期ロード時の表示切り替え
      navigate(window.location.pathname);

      // 入力画面 → 確認画面
      $("#to-confirm").click(function () {
        const name = $("#name").val().trim();
        const email = $("#email").val().trim();
        const message = $("#message").val().trim();

        // 入力チェック
        if (!name || !email || !message) {
          alert("全ての項目を入力してください。");
          return;
        }

        const emailRegex = /^[^\s@]+@[^\s@]+\.[^\s@]+$/;
        if (!emailRegex.test(email)) {
          alert("有効なメールアドレスを入力してください。");
          return;
        }

        // 確認画面に値を反映
        $("#confirm-name").text(name);
        $("#confirm-email").text(email);
        $("#confirm-message").text(message);

        // URLと画面を変更
        navigate("/confirm");
      });

      // 確認画面 → 入力画面
      $("#back-to-input").click(function () {
        navigate("/");
      });

      // 確認画面 → 完了画面(フォーム送信)
      $("#submit-form").click(function () {
        const formData = {
          name: $("#name").val(),
          email: $("#email").val(),
          message: $("#message").val(),
        };

        $.ajax({
          url: "backend/contact.php",
          type: "POST",
          contentType: "application/json",
          data: JSON.stringify(formData),
          success: function (response) {
            if (response.success) {
              navigate("/complete");
            } else {
              alert("送信に失敗しました: " + (response.error || "不明なエラー"));
            }
          },
          error: function () {
            alert("エラーが発生しました。");
          },
        });
      });

      // 完了画面 → 入力画面(フォームリセット)
      $("#reset-form").click(function () {
        $("#name").val("");
        $("#email").val("");
        $("#message").val("");
        navigate("/");
      });
    });
  </script>
</body>
</html>
2. サーバーサイド: backend/contact.php
以下のスクリプトを利用してフォームデータを受け取り、メールを送信します。
<?php
header('Content-Type: application/json');

// リクエストデータの取得
$data = json_decode(file_get_contents('php://input'), true);

// 入力チェック
if (empty($data['name']) || empty($data['email']) || empty($data['message'])) {
    echo json_encode(['success' => false, 'error' => '入力内容が不完全です。']);
    exit;
}

// 管理者への通知メール
$toAdmin = 'admin@example.com';
$subjectAdmin = 'お問い合わせフォームからのメッセージ';
$messageAdmin = "名前: {$data['name']}\nメールアドレス: {$data['email']}\nメッセージ: {$data['message']}";
$headersAdmin = 'From: noreply@example.com';

$mailToAdmin = mail($toAdmin, $subjectAdmin, $messageAdmin, $headersAdmin);

// 問い合わせ者への自動返信メール
$toUser = $data['email'];
$subjectUser = 'お問い合わせありがとうございます';
$messageUser = "{$data['name']} 様\n\nお問い合わせありがとうございます。\n以下の内容で受け付けました。\n----------------------\nお名前: {$data['name']}\nメールアドレス: {$data['email']}\nお問い合わせ内容:\n{$data['message']}\n----------------------\n\n担当者より折り返しご連絡いたします。";
$headersUser = 'From: noreply@example.com';

$mailToUser = mail($toUser, $subjectUser, $messageUser, $headersUser);

if ($mailToAdmin && $mailToUser) {
    echo json_encode(['success' => true]);
} else {
    echo json_encode(['success' => false, 'error' => 'メール送信に失敗しました。']);
}
3. .htaccess
.htaccess を以下のように設定し、すべてのリクエストを index.html にリダイレクトします。
RewriteEngine On
RewriteBase /
RewriteCond %{REQUEST_FILENAME} !-f
RewriteCond %{REQUEST_FILENAME} !-d
RewriteRule ^ /index.html [L]
まとめ
history.pushState を活用することで、URLを動的に変更しながらページを切り替えるシームレスなフォームを実現できました。


コメント