本記事では、React Router を活用して、3ステップ構成(入力・確認・完了)のお問い合わせフォームを作成する方法をご紹介します。この方法では各画面が異なるURLに対応しており、直感的な操作性を実現できます。
使用技術とバージョン情報
- React: 17.x (UMD版を利用)
- React Router DOM: 5.3.4
- Tailwind CSS: 3.x (CDN経由で最新バージョンを使用 ※テストは3.4.15)
- PHP: 8.2.22
- サーバー環境: エックスサーバー
完成イメージ
フォーム構成
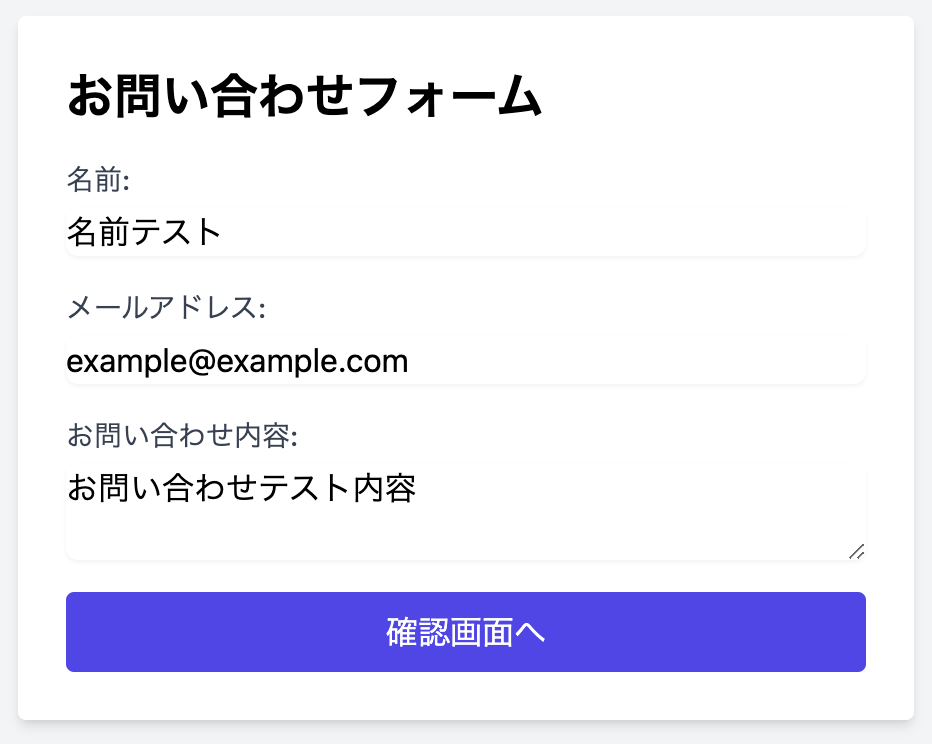
- 入力画面: 名前、メールアドレス、お問い合わせ内容を入力します。
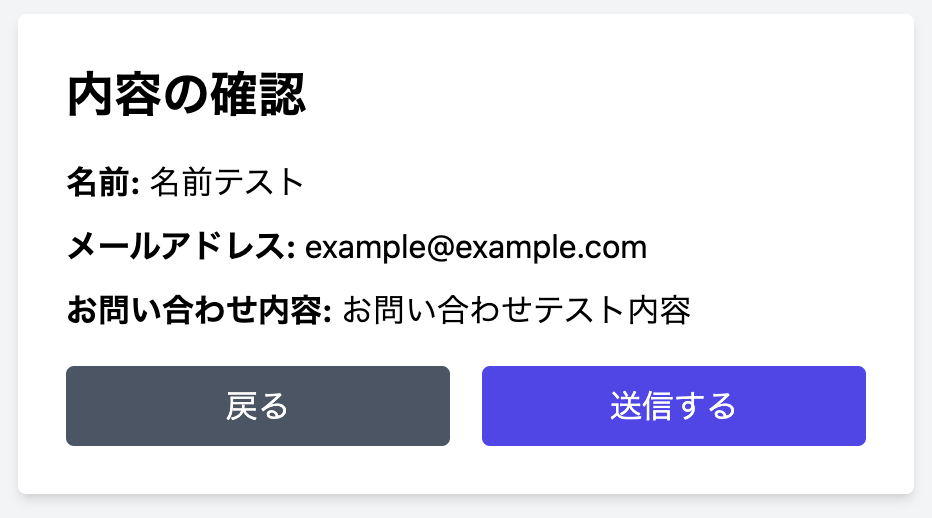
- 確認画面: 入力内容を確認して送信または修正できます。
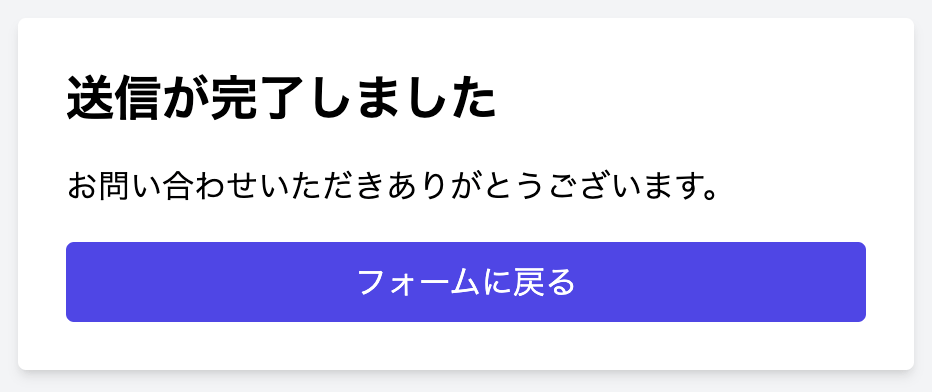
- 完了画面: 問い合わせ送信が完了した旨を表示します。
URL構成
- 入力画面:
/ - 確認画面:
/confirm - 完了画面:
/complete
React Router DOMの5系を利用する理由
React Router DOMの最新版(6系以降)では、UMD形式での配布が廃止されています。そのため、CDNを利用した手軽な導入を希望する場合には、5系(最新は5.3.4) を利用する必要があります。
また、5系では以下の特徴があり、軽量なフォームアプリケーションに適しています。
- 簡潔なルーティング構文:
SwitchやRouteを使ったシンプルなルーティングが可能。 - 互換性: 既存のReactアプリや古いライブラリとも高い互換性を持つ。
React Routerを利用するメリット
React Routerを利用することで、以下の利点を得られます。
- URLベースのナビゲーション:
各画面にURLを割り当てることで、ブラウザのアドレスバーを活用した直感的な操作性を提供します。 - SPA(シングルページアプリケーション)構築:
React Routerはコンポーネントを動的に切り替えるため、ページ遷移が高速で、ユーザー体験を向上させます。 - 履歴管理のサポート:
React Routerはブラウザの「戻る」「進む」機能と連携して動作するため、通常のWebアプリと同じように操作できます。 - ルーティングの柔軟性:
動的ルート(例:/users/:id)やクエリパラメータを使用することで、複雑なルーティングも簡単に実現できます。 - コードの分離:
各ページを個別のコンポーネントとして作成することで、コードが整理され保守性が向上します。
.htaccessファイルの設定
React Routerを使用したアプリケーションでは、ブラウザのリロード時にURLが直接アクセスされる場合があります。その際に適切なページを表示するため、以下の.htaccessファイルをプロジェクトのルートディレクトリに追加してください。
# URLのパスをindex.htmlにリダイレクト
RewriteEngine On
RewriteBase /
RewriteCond %{REQUEST_FILENAME} !-f
RewriteCond %{REQUEST_FILENAME} !-d
RewriteRule ^ /index.html [L]この設定により、全てのリクエストがindex.htmlにリダイレクトされ、React Routerが正しくURLを処理できるようになります。
実装手順
1. 必要なライブラリを読み込む
以下をHTMLファイル内の<head>タグに追加します。
<script src="https://cdn.tailwindcss.com"></script>
<script src="https://unpkg.com/react@17/umd/react.development.js"></script>
<script src="https://unpkg.com/react-dom@17/umd/react-dom.development.js"></script>
<script src="https://unpkg.com/react-router-dom@5.3.4/umd/react-router-dom.min.js"></script>
<script src="https://unpkg.com/@babel/standalone/babel.min.js"></script>
2. フロントエンドのコード
以下はReact Routerを使ったフォームのフロントエンド実装例です。
<!DOCTYPE html>
<html lang="ja">
<head>
  <meta charset="UTF-8">
  <meta name="viewport" content="width=device-width, initial-scale=1.0">
  <title>React Router お問い合わせフォーム</title>
  <script src="https://cdn.tailwindcss.com"></script>
  <script src="https://unpkg.com/react@17/umd/react.development.js"></script>
  <script src="https://unpkg.com/react-dom@17/umd/react-dom.development.js"></script>
  <script src="https://unpkg.com/react-router-dom@5.3.4/umd/react-router-dom.min.js"></script>
  <script src="https://unpkg.com/@babel/standalone/babel.min.js"></script>
</head>
<body class="bg-gray-100 min-h-screen flex items-center justify-center">
  <div id="root" class="container mx-auto p-4 max-w-screen-md"></div>
  <script type="text/babel">
    const { BrowserRouter, Route, Switch, useHistory } = window.ReactRouterDOM;
    const { useState } = React;

    function InputForm() {
      const history = useHistory();
      const [formData, setFormData] = useState({
        name: "",
        email: "",
        message: "",
      });

      const handleChange = (e) => {
        const { name, value } = e.target;
        setFormData((prev) => ({ ...prev, [name]: value }));
      };

      const handleSubmit = (e) => {
        e.preventDefault();
        localStorage.setItem("formData", JSON.stringify(formData));
        history.push("/confirm");
      };

      return (
        <div className="bg-white shadow-md rounded p-6 w-full max-w-md mx-auto">
          <h1 className="text-2xl font-bold mb-4">お問い合わせフォーム</h1>
          <form onSubmit={handleSubmit}>
            <div className="mb-4">
              <label htmlFor="name" className="block text-sm font-medium text-gray-700">名前:</label>
              <input
                type="text"
                id="name"
                name="name"
                value={formData.name}
                onChange={handleChange}
                required
                className="mt-1 block w-full border-gray-300 rounded-md shadow-sm focus:ring-indigo-500 focus:border-indigo-500"
              />
            </div>
            <div className="mb-4">
              <label htmlFor="email" className="block text-sm font-medium text-gray-700">メールアドレス:</label>
              <input
                type="email"
                id="email"
                name="email"
                value={formData.email}
                onChange={handleChange}
                required
                className="mt-1 block w-full border-gray-300 rounded-md shadow-sm focus:ring-indigo-500 focus:border-indigo-500"
              />
            </div>
            <div className="mb-4">
              <label htmlFor="message" className="block text-sm font-medium text-gray-700">お問い合わせ内容:</label>
              <textarea
                id="message"
                name="message"
                value={formData.message}
                onChange={handleChange}
                required
                className="mt-1 block w-full border-gray-300 rounded-md shadow-sm focus:ring-indigo-500 focus:border-indigo-500"
              />
            </div>
            <button type="submit" className="w-full bg-indigo-600 text-white py-2 px-4 rounded hover:bg-indigo-700">
              確認画面へ
            </button>
          </form>
        </div>
      );
    }

    function ConfirmForm() {
      const history = useHistory();
      const formData = JSON.parse(localStorage.getItem("formData"));

      const handleBack = () => {
        history.push("/");
      };

      const handleSubmit = () => {
        fetch("backend/contact.php", {
          method: "POST",
          headers: { "Content-Type": "application/json" },
          body: JSON.stringify(formData),
        })
          .then(() => {
            localStorage.removeItem("formData");
            history.push("/complete");
          })
          .catch(() => alert("送信に失敗しました。"));
      };

      return (
        <div className="bg-white shadow-md rounded

 p-6 w-full max-w-md mx-auto">
          <h1 className="text-2xl font-bold mb-4">内容の確認</h1>
          <p><strong>名前:</strong> {formData.name}</p>
          <p><strong>メールアドレス:</strong> {formData.email}</p>
          <p><strong>お問い合わせ内容:</strong> {formData.message}</p>
          <div className="flex space-x-4 mt-4">
            <button onClick={handleBack} className="w-1/2 bg-gray-600 text-white py-2 px-4 rounded">
              戻る
            </button>
            <button onClick={handleSubmit} className="w-1/2 bg-indigo-600 text-white py-2 px-4 rounded">
               送信する
            </button>
          </div>
        </div>
      );
    }

    function CompleteForm() {
      const history = useHistory();
      return (
        <div className="bg-white shadow-md rounded p-6 w-full max-w-md mx-auto">
          <h1 className="text-2xl font-bold mb-4">送信が完了しました</h1>
          <p>お問い合わせいただきありがとうございます。</p>
          <button
            onClick={() => history.push("/")}
            className="mt-4 w-full bg-indigo-600 text-white py-2 px-4 rounded"
          >
            フォームに戻る
          </button>
        </div>
      );
    }

    function App() {
      return (
        <BrowserRouter>
          <Switch>
            <Route exact path="/" component={InputForm} />
            <Route path="/confirm" component={ConfirmForm} />
            <Route path="/complete" component={CompleteForm} />
          </Switch>
        </BrowserRouter>
      );
    }

    ReactDOM.render(<App />, document.getElementById("root"));
  </script>
</body>
</html>
3. バックエンドのコード
以下は、contact.phpのコードです。フロントエンドから送信されたデータを受け取り、メールを送信します。
<?php
header('Content-Type: application/json');

// リクエストデータの取得
$data = json_decode(file_get_contents('php://input'), true);

// 入力チェック
if (empty($data['name']) || empty($data['email']) || empty($data['message'])) {
    echo json_encode(['success' => false, 'error' => '入力内容が不完全です。']);
    exit;
}

// 管理者への通知メール
$toAdmin = 'admin@example.com';
$subjectAdmin = 'お問い合わせフォームからのメッセージ';
$messageAdmin = "名前: {$data['name']}\nメールアドレス: {$data['email']}\nメッセージ: {$data['message']}";
$headersAdmin = 'From: noreply@example.com';

$mailToAdmin = mail($toAdmin, $subjectAdmin, $messageAdmin, $headersAdmin);

// 問い合わせ者への自動返信メール
$toUser = $data['email'];
$subjectUser = 'お問い合わせありがとうございます';
$messageUser = "{$data['name']} 様\n\nお問い合わせありがとうございます。\n以下の内容で受け付けました。\n----------------------\nお名前: {$data['name']}\nメールアドレス: {$data['email']}\nお問い合わせ内容:\n{$data['message']}\n----------------------\n\n担当者より折り返しご連絡いたします。";
$headersUser = 'From: noreply@example.com';

$mailToUser = mail($toUser, $subjectUser, $messageUser, $headersUser);

if ($mailToAdmin && $mailToUser) {
    echo json_encode(['success' => true]);
} else {
    echo json_encode(['success' => false, 'error' => 'メール送信に失敗しました。']);
}
フォームのスクリーンショット
入力画面

確認画面

完了画面


コメント