
この記事では、Laravel Sail 環境で Google Maps JavaScript API と Geocoding API を使用して、住所検索機能および地図を使った緯度・経度の自動入力機能を実装する方法を紹介します。この機能により、ユーザーは住所を検索して地図上の場所を指定したり、地図上の操作で緯度・経度を自動で入力することができるようになります。
前提条件
- Laravel Sail 環境での開発が行われていること
- Google API Key を取得済みで、Google Maps JavaScript API と Geocoding API が有効化されていること
ステップ 1: Google Maps API キーの設定
Google Maps API を使用するために、Google API Console から取得した API キーを .env ファイルに設定します。
GOOGLE_MAPS_API_KEY=your_google_maps_api_key_here次に、Laravel の設定ファイル config/services.php でこの API キーを読み込めるように設定します。
return [
    'google_maps' => [
        'api_key' => env('GOOGLE_MAPS_API_KEY'),
    ],
];
ステップ 2: Google Maps API を Blade テンプレートに組み込む
Google Maps API を呼び出すために、Blade テンプレートに <script> タグを追加します。これは、ページを読み込む際に Google Maps ライブラリをロードし、API キーを使って地図描画や住所検索を行うためのスクリプトです。
<script src="https://maps.googleapis.com/maps/api/js?key={{ config('services.google_maps.api_key') }}&libraries=places"></script>ステップ 3: スポット登録フォームと地図の組み込み
次に、新規スポット登録フォームに Google Maps を組み込み、地図の操作で緯度・経度を自動入力する機能を追加します。
住所検索機能付きのスポット登録フォーム
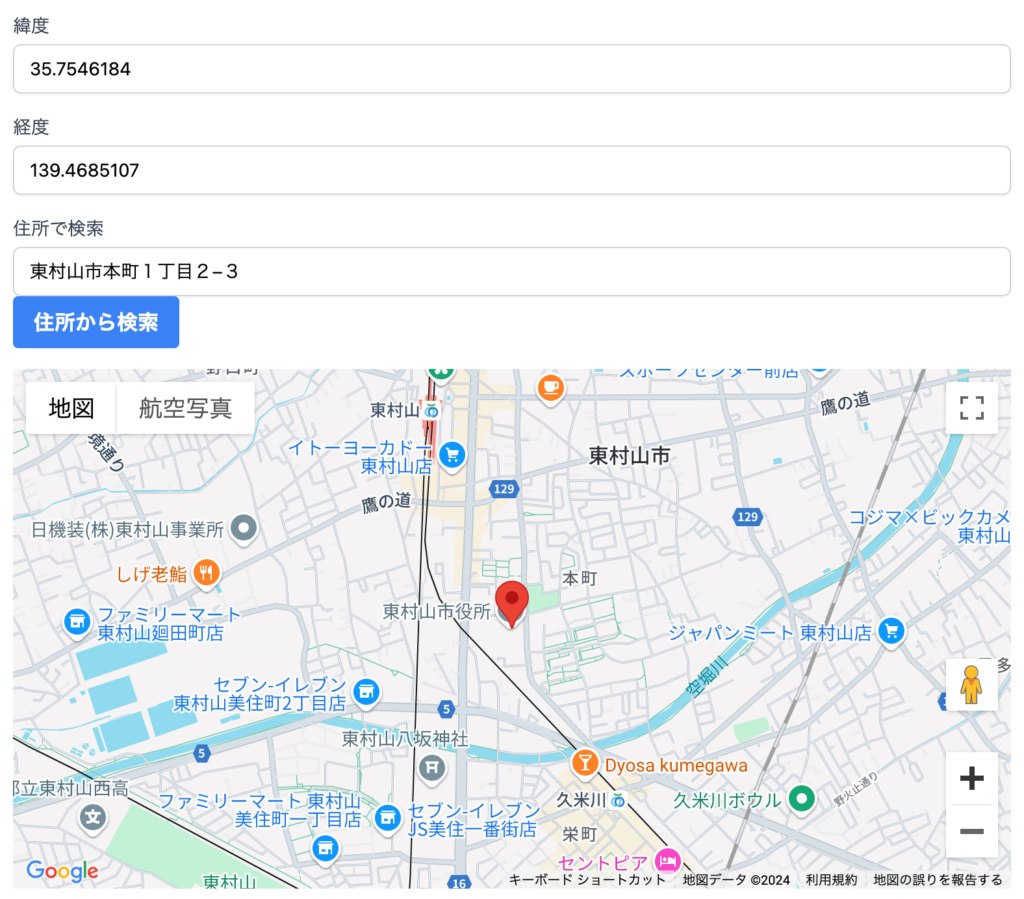
以下のコードは、ユーザーが住所を検索して地図上の場所を選択し、その地点の緯度と経度を自動入力するフォームの例です。
@extends('layouts.admin')

@section('title', 'スポット登録')

@section('content')
    <h1>新規スポット登録</h1>

    <form action="{{ route('admin.spots.store') }}" method="POST">
        @csrf

        <!-- 名前 -->
        <div>
            <label for="name">名前</label>
            <input type="text" name="name" required>
        </div>

        <!-- 郵便番号 -->
        <div>
            <label for="postal_code">郵便番号</label>
            <input type="text" name="postal_code">
        </div>

        <!-- 都道府県 -->
        <div>
            <label for="prefecture_id">都道府県</label>
            <select name="prefecture_id" required>
                @foreach($prefectures as $prefecture)
                    <option value="{{ $prefecture->id }}">
                        {{ $prefecture->name }}
                    </option>
                @endforeach
            </select>
        </div>

        <!-- 住所 -->
        <div>
            <label for="address">住所</label>
            <input type="text" name="address" required>
        </div>

        <!-- 電話番号 -->
        <div>
            <label for="phone_number">電話番号</label>
            <input type="text" name="phone_number">
        </div>

        <!-- FAX番号 -->
        <div>
            <label for="fax">FAX番号</label>
            <input type="text" name="fax">
        </div>

        <!-- URL -->
        <div>
            <label for="url">URL</label>
            <input type="text" name="url">
        </div>

        <!-- カテゴリ -->
        <div>
            <label for="category">カテゴリ</label>
            <input type="text" name="category" required>
        </div>

        <!-- 緯度 -->
        <div>
            <label for="latitude">緯度</label>
            <input type="text" name="latitude" id="latitude">
        </div>

        <!-- 経度 -->
        <div>
            <label for="longitude">経度</label>
            <input type="text" name="longitude" id="longitude">
        </div>

        <!-- 住所検索フォーム -->
        <div>
            <label for="search_address">住所で検索</label>
            <input type="text" id="search_address">
            <button type="button" id="searchAddress">住所から検索</button>
        </div>

        <!-- Google Maps 表示 -->
        <div id="map" style="height: 400px;"></div>

        <button type="submit">登録</button>
    </form>

    <script>
        let map;
        let marker;

        function initMap() {
            const defaultPosition = { lat: 35.6895, lng: 139.6917 }; // 初期位置(東京)
            map = new google.maps.Map(document.getElementById('map'), {
                center: defaultPosition,
                zoom: 14,
            });

            marker = new google.maps.Marker({
                position: defaultPosition,
                map: map,
                draggable: true,
            });

            // マーカーの位置が変更されたときに緯度・経度を更新
            marker.addListener('dragend', function() {
                const position = marker.getPosition();
                document.getElementById('latitude').value = position.lat();
                document.getElementById('longitude').value = position.lng();
            });

            // 住所検索
            document.getElementById('searchAddress').addEventListener('click', function() {
                const address = document.getElementById('search_address').value;
                const geocoder = new google.maps.Geocoder();
                geocoder.geocode({ address: address }, function(results, status) {
                    if (status === 'OK') {
                        map.setCenter(results[0].geometry.location);
                        marker.setPosition(results[0].geometry.location);
                        document.getElementById('latitude').value = results[0].geometry.location.lat();
                        document.getElementById('longitude').value = results[0].geometry.location.lng();
                    } else {
                        alert('住所が見つかりませんでした: ' + status);
                    }
                });
            });
        }

        // Google Maps の初期化
        window.onload = initMap;
    </script>
@endsection
ステップ 4: Geocoding API と Google Maps API の使い分け
今回の実装では、Google Maps JavaScript API と Geocoding API の2つを使用しています。それぞれの役割は以下の通りです。
- Google Maps JavaScript API: 地図を表示し、ユーザーが操作可能なマーカーを設置します。また、マーカーのドラッグ操作や地図の中心変更に伴って、緯度・経度を自動で更新します。
- Geocoding API: 住所を緯度・経度に変換するために使用します。ユーザーが住所を入力し、検索ボタンを押すと、その住所の緯度・経度を取得し、地図上に反映させます。
最後に
このブログ記事では、Laravel Sail 環境で Google Maps JavaScript API と Geocoding API を活用して、住所検索と緯度・経度の自動入力機能を実装する方法を紹介しました。地図上で直感的に地点を指定できるだけでなく、住所検索によって緯度・経度を自動で取得することで、ユーザーの利便性が向上します。
バージョン情報
- Laravel: 11.27.2
- PHP: 8.3.12
- Google Maps JavaScript API
- Geocoding API


コメント